
Luna had her world premiere at the Somnambulist Puppet Sideshow at The Caligari Salon, hosted by the MacKenzie Art Gallery, October 20, 2016. Here is the story of her birth, with thanks to the amazing artists who helped bring her to life!
1. Concept painting
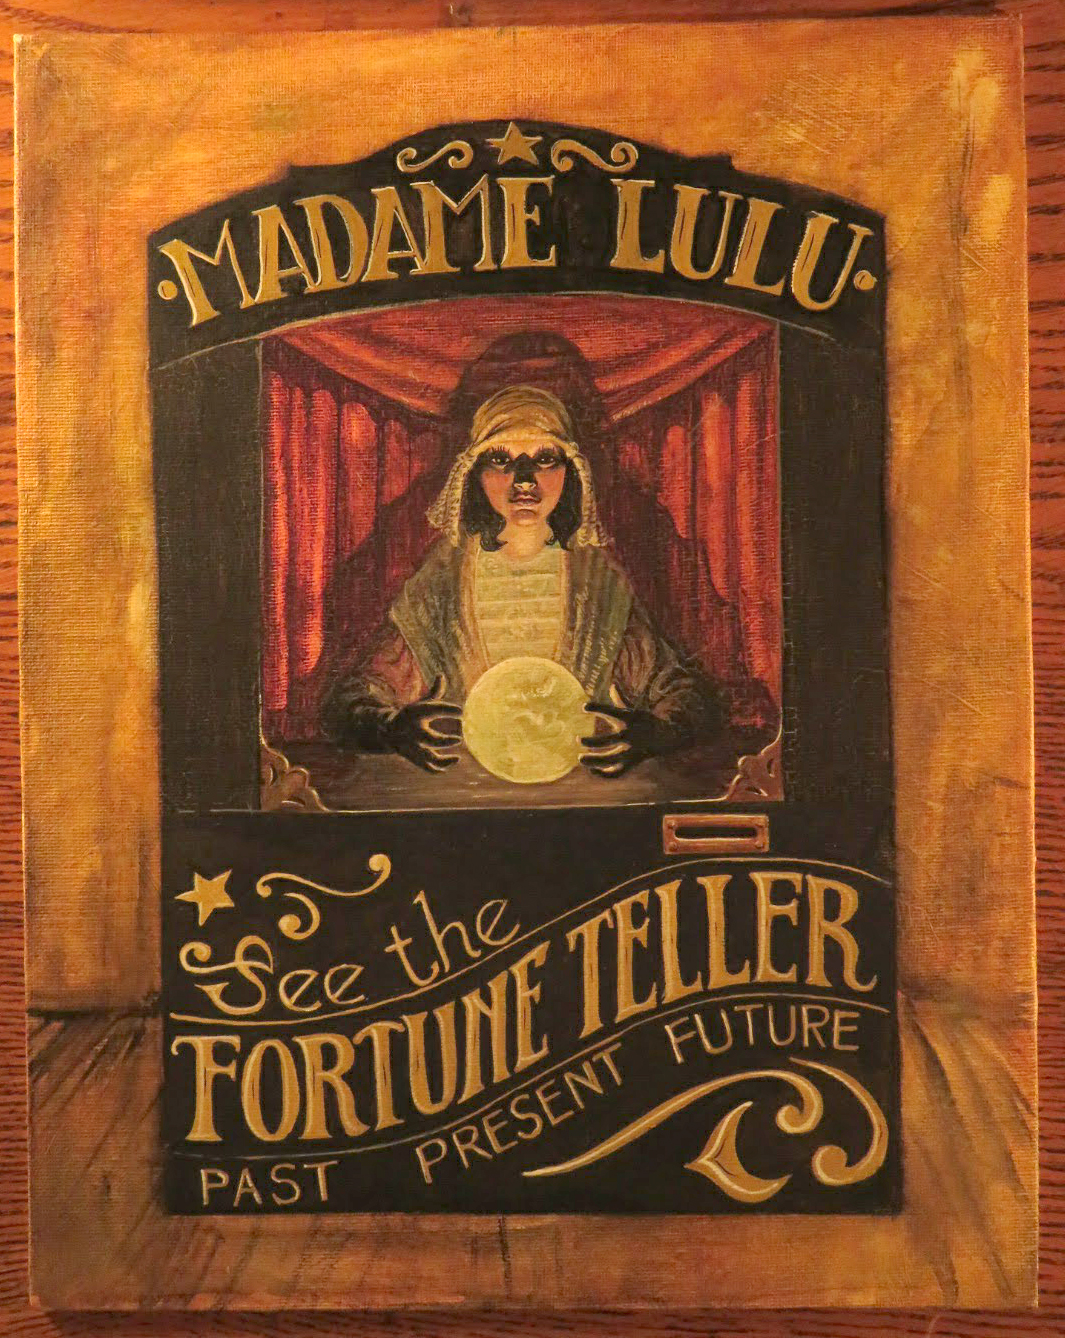 I almost always start any project by getting images out of my head with a few sketches, and then a painting that I can keep referring to. After a lot of research and thinking about what I wanted, I created this concept painting on canvas board. Her name will eventually be changed to Luna, thanks to Candace Cardoso. It’s a better name!
Countdown to performance day: 14 months
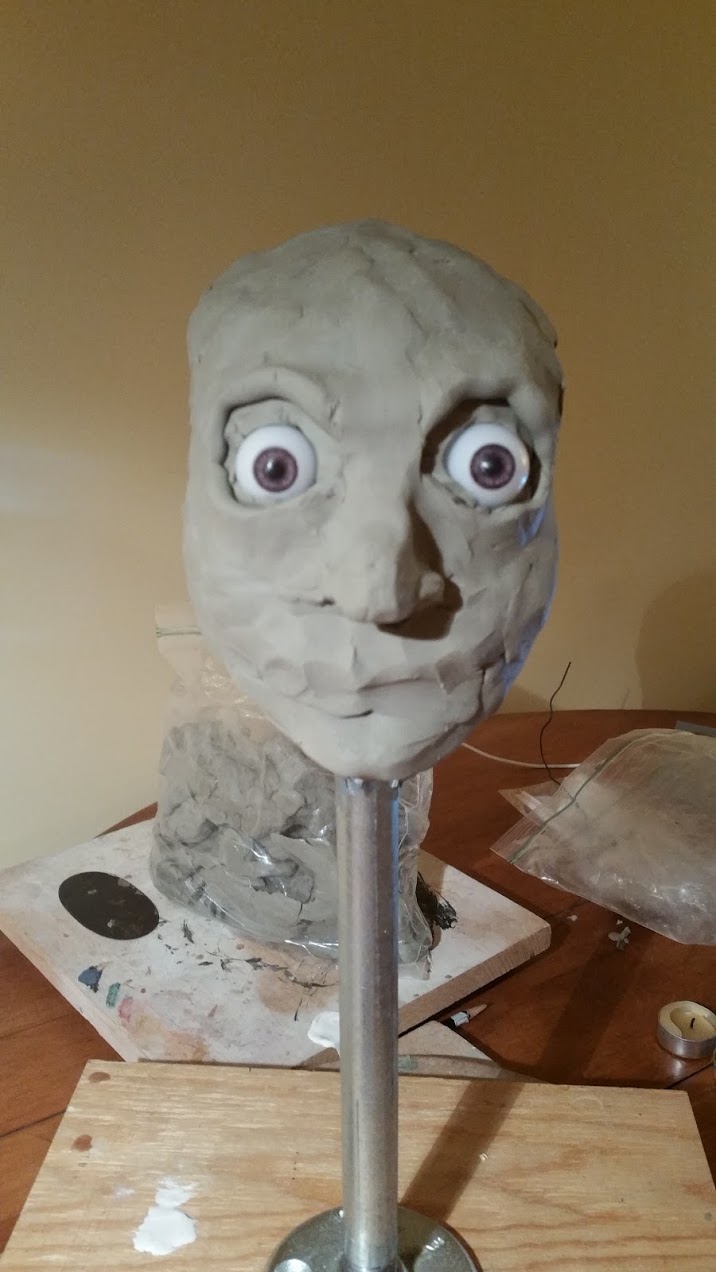
2. Sculpting the face
Starting with duct tape, styrofoam, temporary eyeballs, and some plumbing hardware, Luna the all-seeing begins life by looking in amazement at the world. I try to get the eyes as symmetrical as possible using calipers. After an hour or so of roughing in of her face in oil-based clay she looks astonished but still pretty ugly….


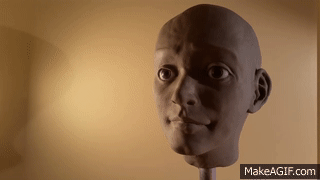 After a couple of weeks on and off tweaking the expression and features, the sculpt is finished! She has a strange expression: a blend of compassion, a little sadness, a little distance, and a thousand-yard stare. Her eyes are oversized, and she has a prominent nose and cleft chin. I really like her. Final smoothing is done with mineral oil and makeup sponges. She will sit in this state for several months while other projects take precedence. I’ll get back to her in about 7 months.
Countdown: 9 months
3. Visit from Jay-petto
 With the other projects cleared off the table, I return to Luna. Before I make the mold, master prop builder and wizard of all trades Jay Robertson, who will be providing Luna’s mechanics, comes over for a visit. He takes measurements and retreats to his genius den to begin designing. Countdown: 2 months
4. Molding
 Ready for the silicone mold process! I am very nervous. I haven’t used silicone for years, and if I do it wrong it will ruin the sculpt. The mix, which is calculated by weight, has to be just perfect. I am hoping I ordered enough Mold Max 30!
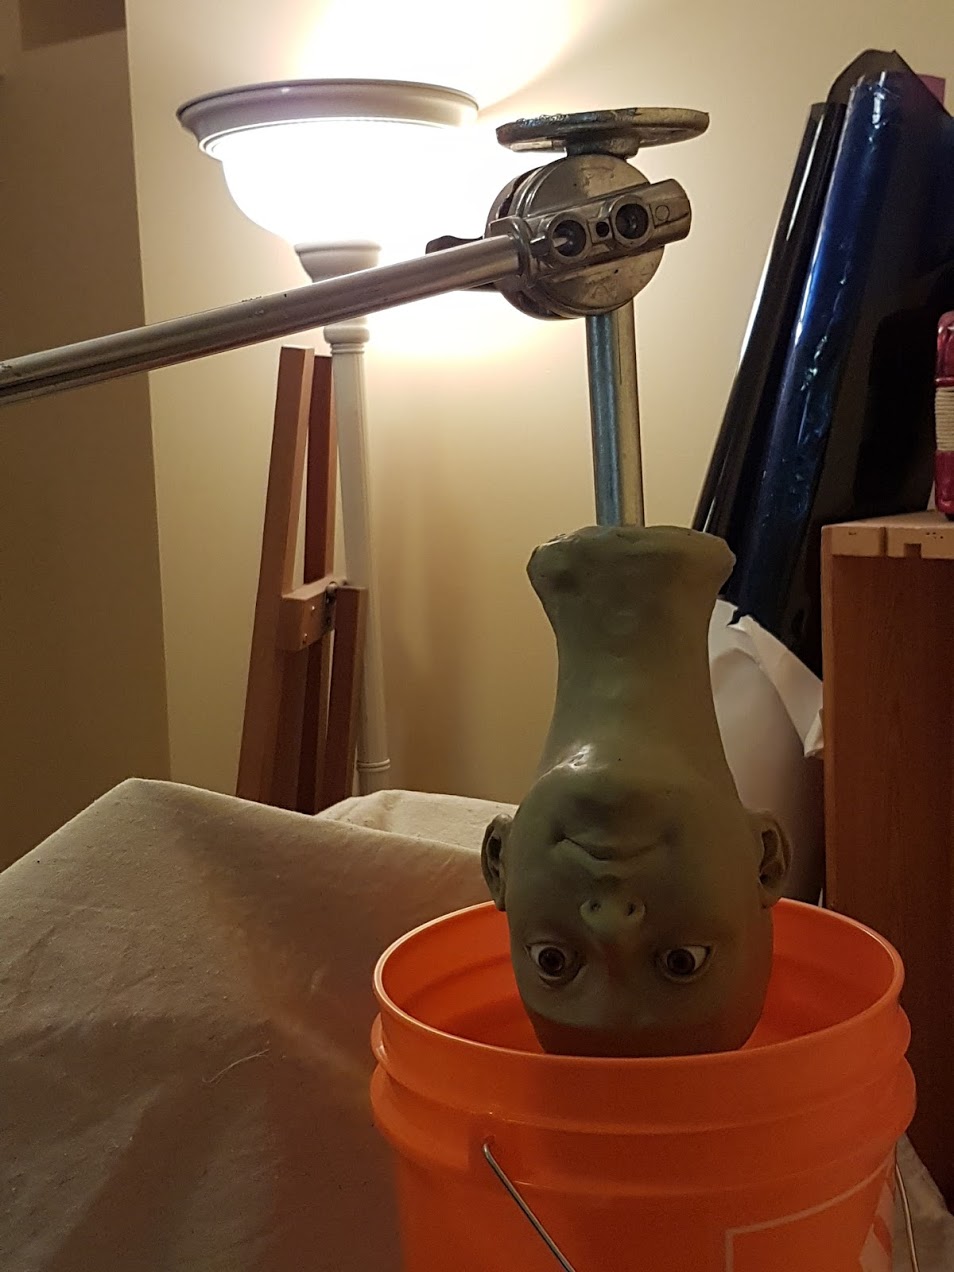 After a lot of worrying, I consult with my friend Jonathan Searles in California, a sculptor and artist with many years in the special effects industry under his belt (Neverending Story, guys!) it is decided that a block mold will be made, rather than painting the silicone on and making a plaster mother mold. Using a C-stand, Luna is suspended carefully upside down and lowered into a bucket (we eventually switched this out for a square bucket for a better fit, to conserve silicone).
 Jon directs every move of the molding and casting process over Skype from his porch in Half Moon Bay, California. Thank goodness! I wouldn’t have known what to do without him.


 I show Jon the mold. We’ve run out of silicone, as I feared, and the level is not high enough to cover the chin or the neck. Jon directs us to use whatever we can find to drop into the mold to raise the level of the silicone to get as much of the neck as we can. It’s ugly, jammed with lath and rocks from the garden, but we’ve brought the level up quite a bit. Countdown: 21 days
 The next day, Jon directs the removal of the bucket. The mold is sliced in half irregularly to create a keyed 2-part mold. Ultimately Jon thinks brushing rather than slushing will give us better results and a more consistent shell, but it’s nice to have the keys for the slush option.
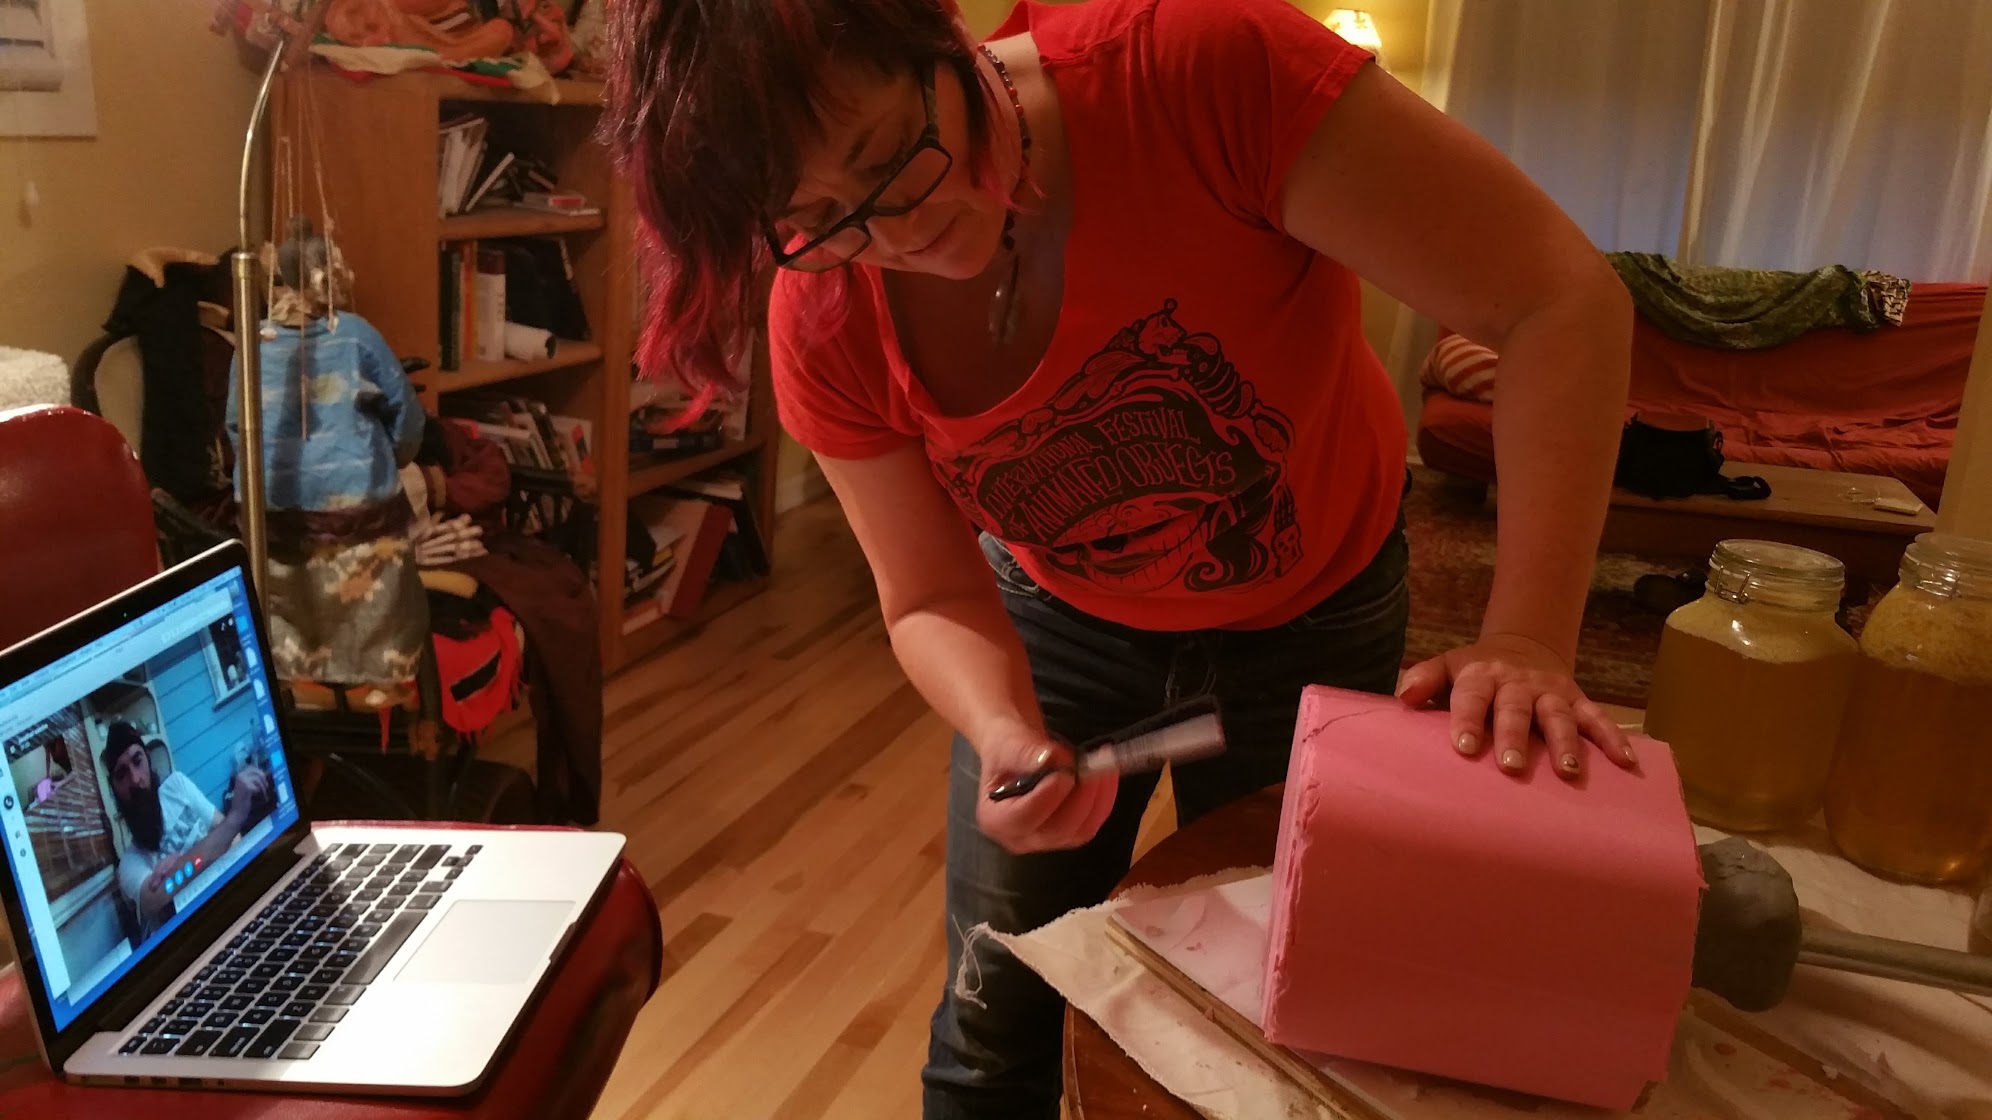
 I pull the clay sculpt out of the mold … And hallelujah! Success! It’s very clean, with no bubbles. Jon is a genius!
The negative mold does that weird optical illusion thing where it seems to be coming out at you.
5. Casting
 Now for the Insta-cast, a “two component, rigid, rapid set polyurethane resin that when mixed in a one to one ratio by volume sets in five to seven minutes to form a hard durable plastic.” Thanks to Douglas & Sturgess of San Francisco for shipping this up post-haste!
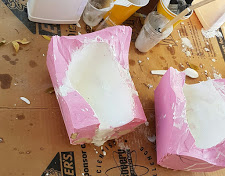
I want to make the cast hollow, so that there is plenty of room for the mechanics, and as thin as it can be while still remaining strong.
Berny again is on hand to help out.
 As mentioned above, we are going for the brushing option, so the two parts of the mold are laid out and we mix up the Insta-cast. Thanks to Jon’s watchful eye from Half Moon Bay… it works! The Insta-cast is poured into the silicone mold and brushed up the sides until it sets. I also decided to use microballons as a filler in the Insta-cast mix to make the head lighter, and to save on resin.
Countdown: 20 days

6. Sculpting the hands
 Jay has picked up the hero face cast and a couple of eyeballs so that he can begin working on the mechs in earnest. Meanwhile, I start on the papier mache hands. The armatures are wire, then using paper and masking tape (a trick I learned from Scott Siedman in California many years ago) I flesh them out, and then start layering on the papier mache strips. Here I am just finishing the final touches with a lovely fine pre-made papier mache, again from the good folks at Douglas & Sturgess in San Francisco!
Countdown: 17 days
 My house at this time is a puppet factory, as I am working on two shows and making a second puppet, a Fiji Mermaid, for the Sideshow.
7. Mechs!
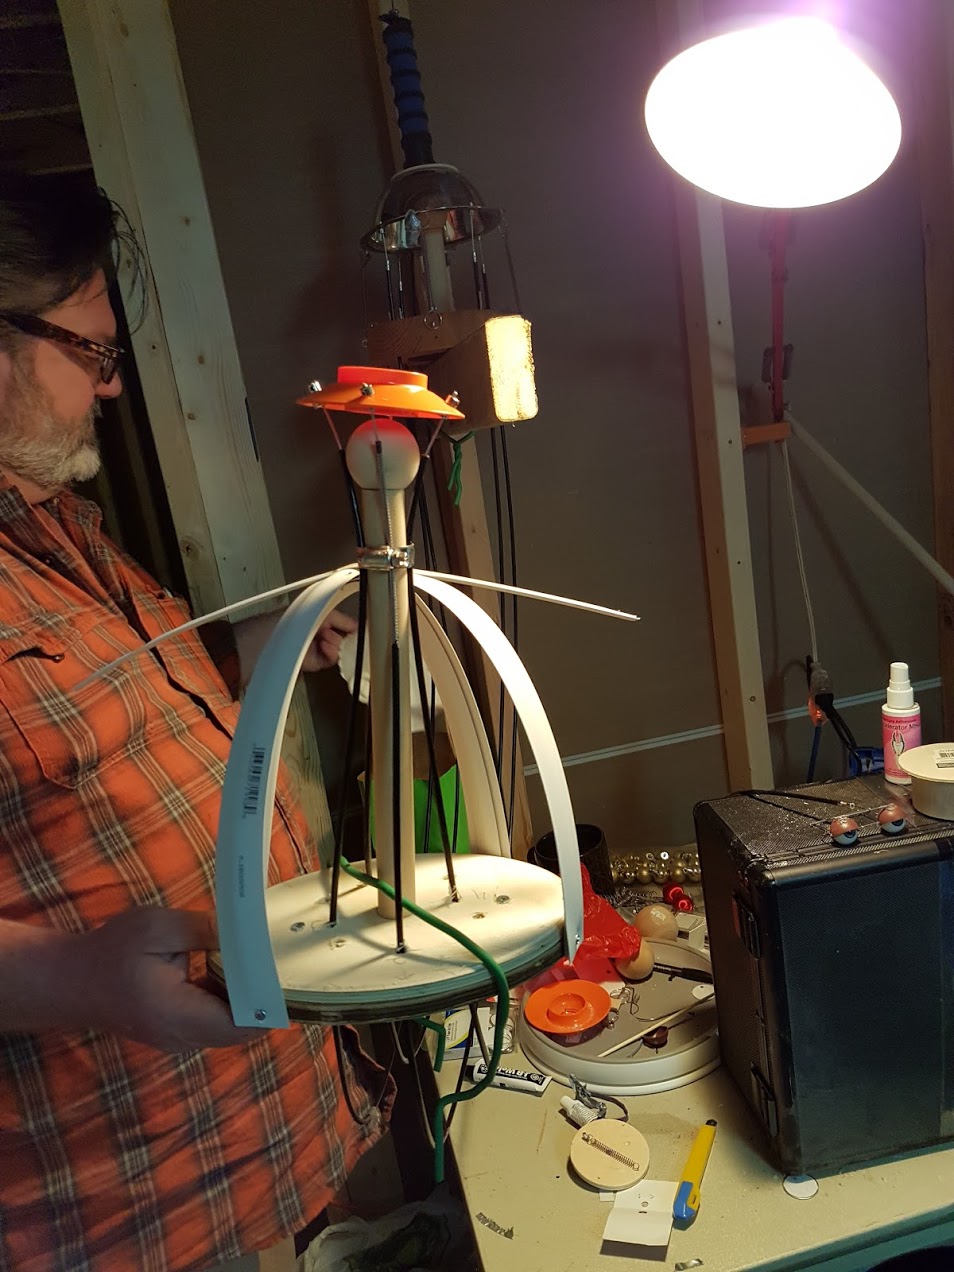 Jay’s ready to show me something! I go visit his genius den and am having a hard time not squealing at what he has created!

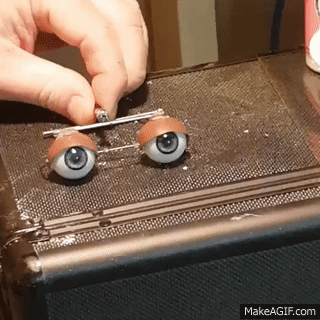
And the eyeballs are working with a camera cable. The movement is perfect!! He’s also roughed out the booth and has some ideas about the arm gimmick.
Countdown: 16 days
8. Booth and final assembly
She’s back! Wonderful Jay delivers the booth and Luna with her head mounted on the gimbel. He’s got ideas for the arm gimmick so that the hands can move independently, and a nice sheet of plexiglass for her to look through. I am so excited to see her coming together! Countdown: 8 days

9. Hair and Costume Design
My beautiful friend Candace Cardoso, a professional costume designer who can make virtually anything out of seemingly thin air, is able to find some time in her busy life, and comes over to look at dressing Luna. The first things she does make me giddy. This is going to be amazing!

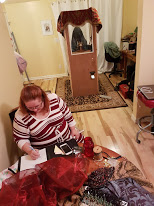
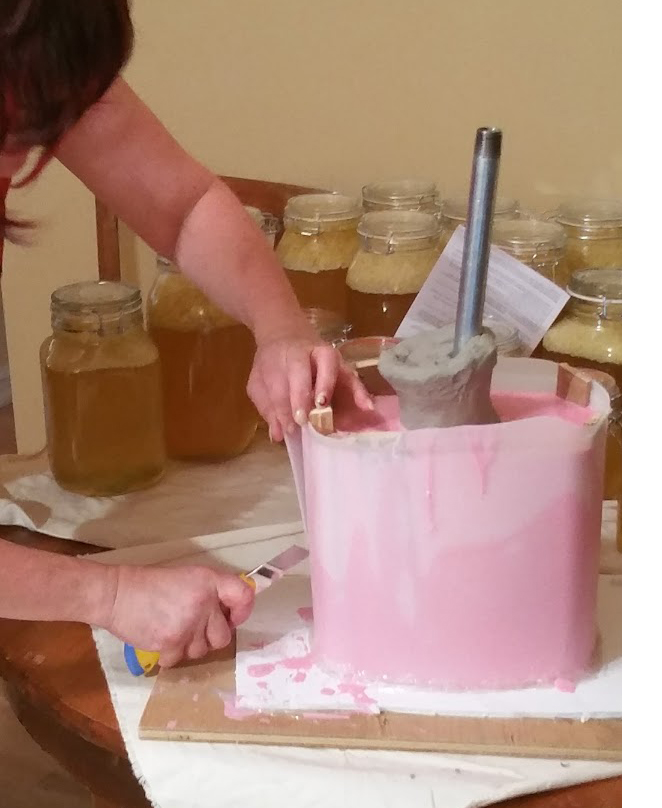
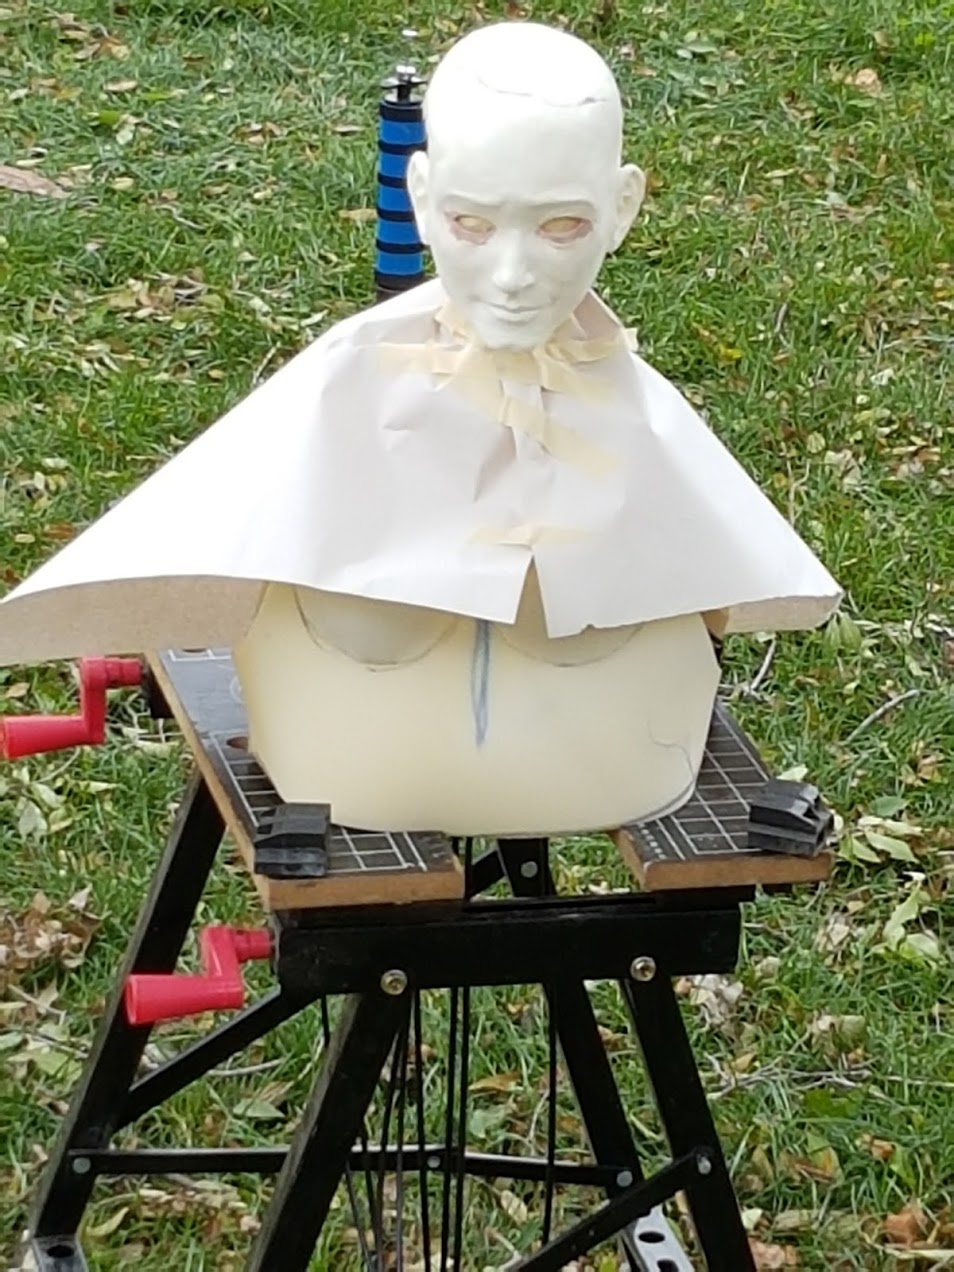
 Candace goes home to build the costume and I make a foam torso more or less anatomically correct, so as to fill out the bodice. Prairie Puppet Underground is building and rehearsing two other puppet shows that come before this one, so I have to step away for a couple of days to tackle the final stretch on our performances for the Saskatchewan Arts Awards. Countdown: 4 days
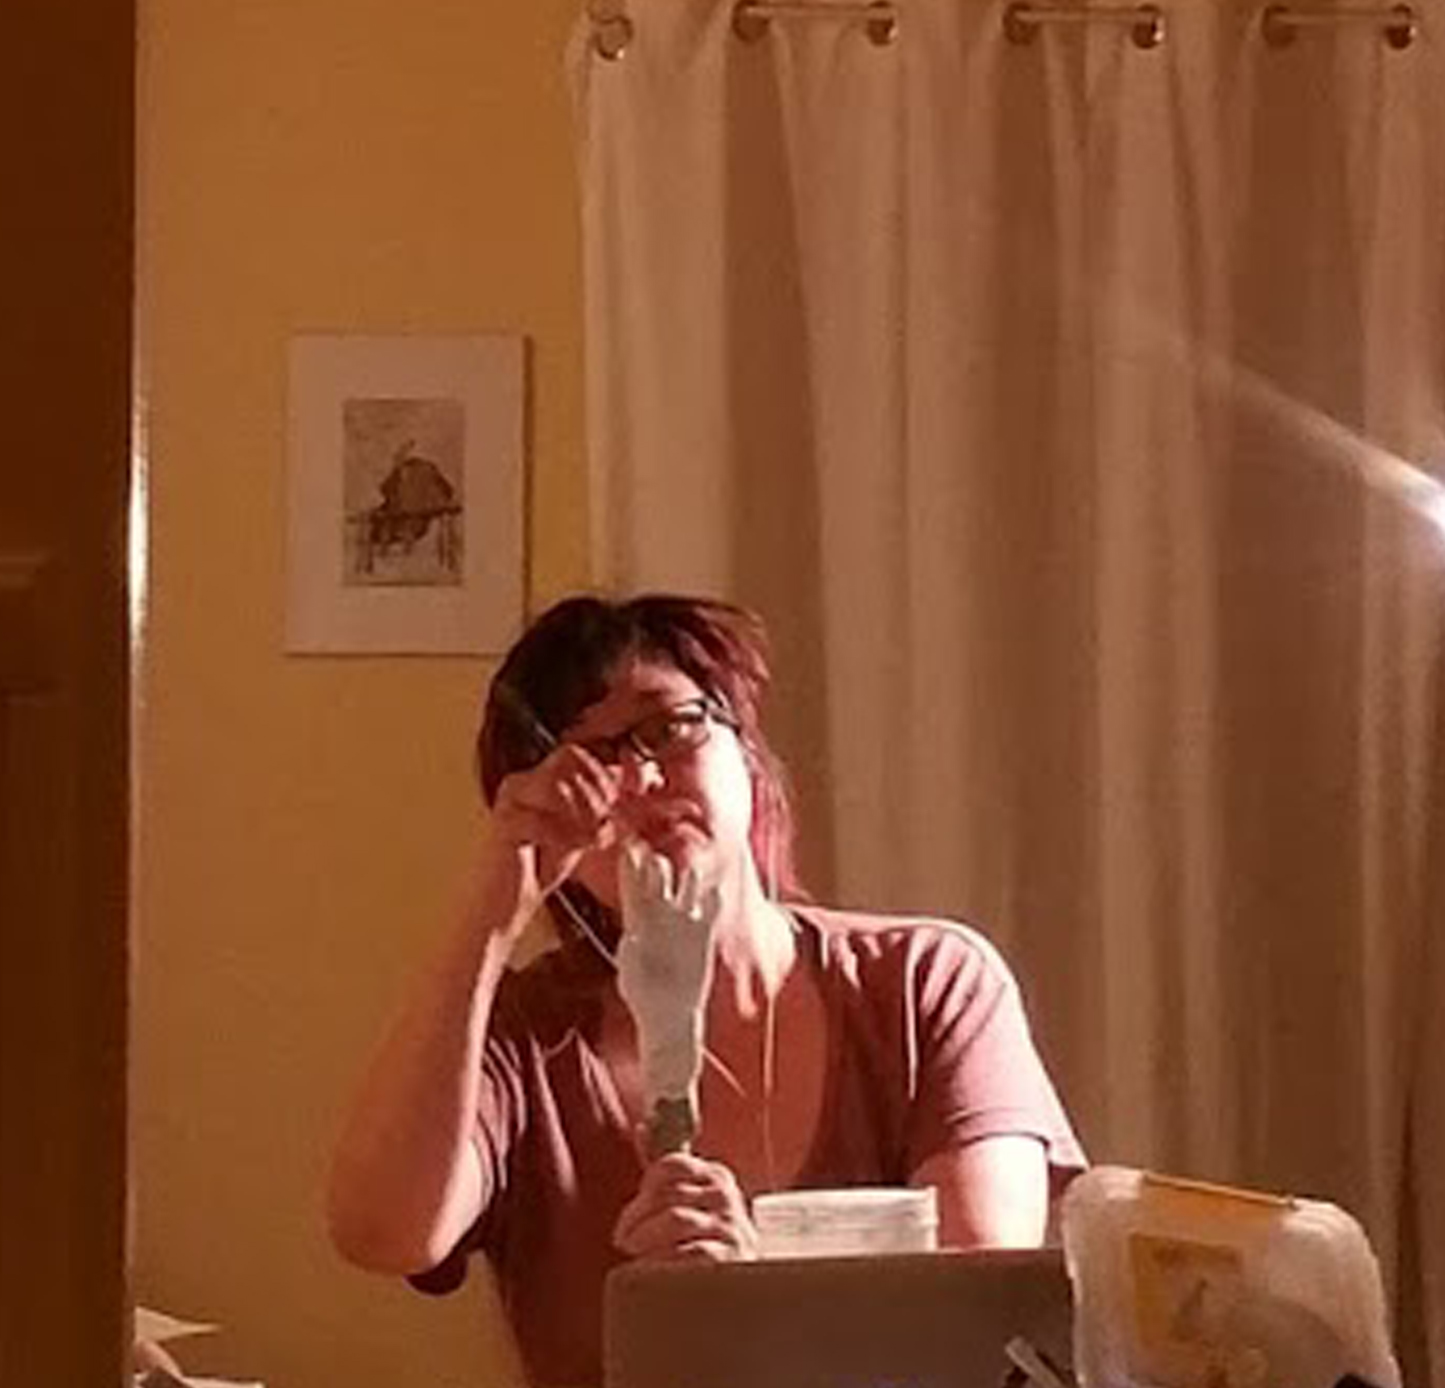
 Rats. She’s working beautifully, but between the original sculpt and the addition of the mechs, the eyes have changed. The eye holes are too big. I know why, and it’s my fault for sculpting lids that Jay had to grind out to add the mechanical blinks. The oversized eye holes are really bugging me. Sometimes I feel like I can deal with it and then finally I just can’t. I chat Jon, my rock through this whole process, and he advises me to build the lower lids up slowly with Bondo, a car body repair epoxy that hardens to a sand-able finish. I finally decide, at the last minute, to take the plunge and do it.
Countdown to installation: 2 days
 A few layers of Bondo and a lot of sanding and the eyes are so much better! Now she has her eye holes taped up and is masked off for a coat of white primer. Countdown to installation: 20 hours
There is still a huge list of things that need to be done. Fixing the eye holes has ruined the eyeball placement, so I need to pry the eye mech out (it’s thoroughly epoxied in place) and re-align the eyes, which is much trickier than you’d think. Also, there are a lot of little things to do: mount the light for the crystal ball, figure out how to make the can for coins stay flush against the inner wall, and finalize the arm gimmick — plus paint the face and hands, and the signs for the front of the booth.

Tom Donnelly always saves the day.
I know I am not going to make it and I am already dizzy with exhaustion. I call on Tom Donnelly, a friend who renovated my house last year, a genius with handy things and a universe of calm. He arrives a few hours later with a van of tools and a big smile. I instantly relax. He makes everything work in a couple of hours and restores my faith. Now I have to work on a talk I have to give in a couple of hours at the University! Argh! Timing! Countdown: 18 hours
10. The Final Stretch!
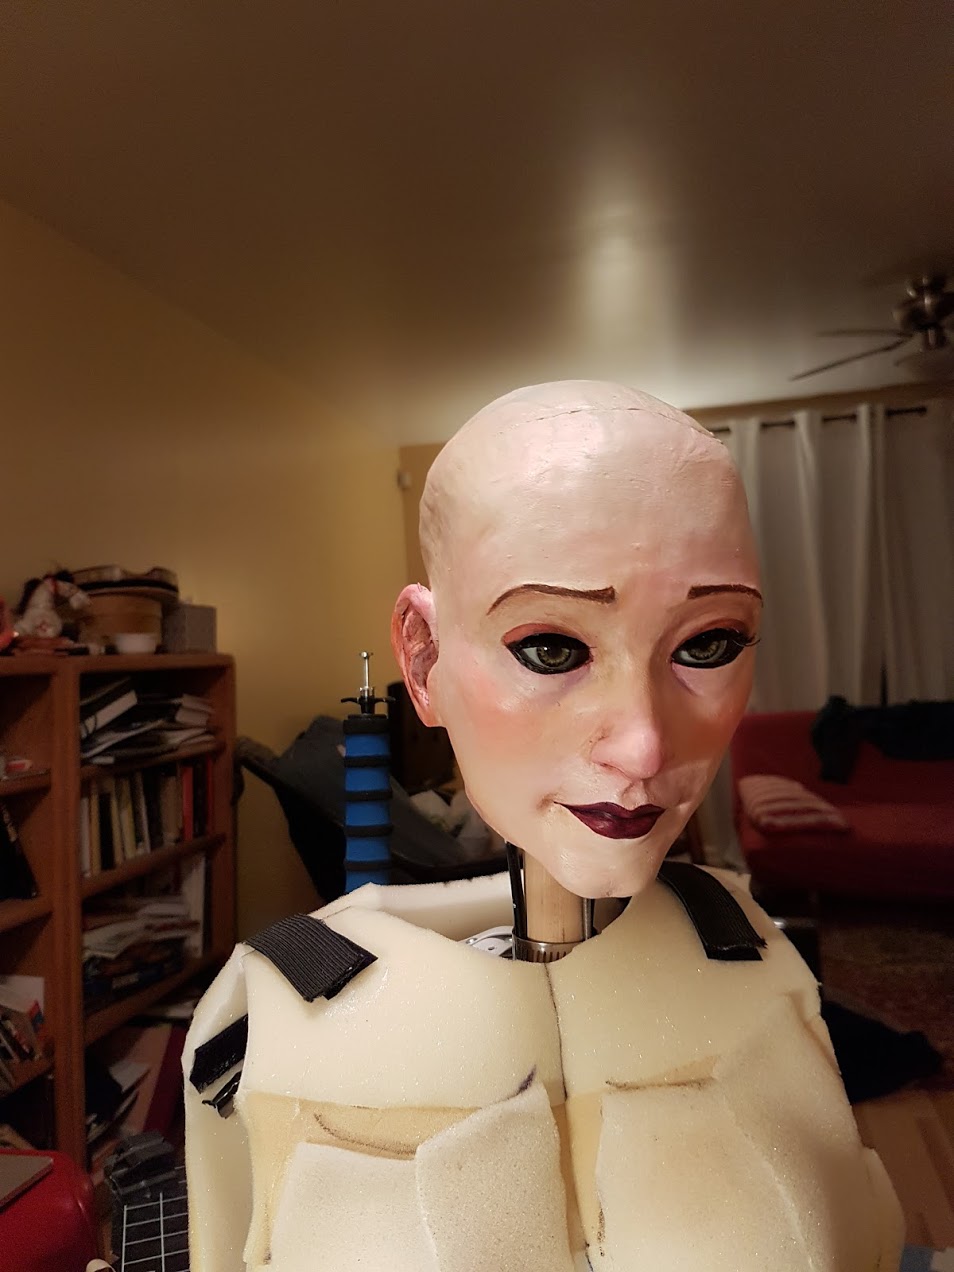
 At about 11 pm I am back from my talk and have had supper. I settle into painting the face and hands. She first gets her Pthalo Blue and matte medium undercoat to give her skin tones a nice cool depth. Next will be a series of matte-medium glazes using Cadmium Red, Cadmium Yellow, and White, with Dioxazine Purple and Burnt Umber in the shadows. I had always dreamed of doing Luna’s paint job in oils, but I’ve run out of time, so acrylic it is. Countdown to installation: 9 hours
 At 4:00 am the hands and face are painted, her eyelashes are on, and her fingernails have been attached. Time to paint the signs for the front of the booth. I get one done, and start the second one. It’s 6:30am and I can’t focus my eyes. The last thing I remember thinking is all I need is to rest my eyes for 10 minutes…then I wake up in the studio fully dressed with my shoes on at 9:00. Countdown to installation: 1 hour.
11. Installation
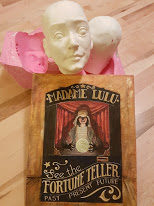
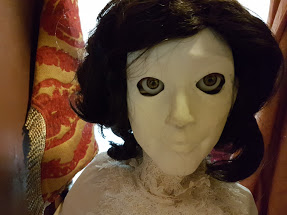
 Somehow it all comes together in time! Luna is installed in the Prairie Puppet Underground’s exhibition, the Somnambulist Puppet Sideshow (beautifully designed by my puppet colleagues and friends Rowan Pantel and Kenn McLeod). The signs I fell asleep on still need to be finished, and the warm hearted Sylvia Ziemann, another puppetientist joining our crazy team, offers to help. She does a great job, and I am able to get the curtains installed and everything else working. Berny picks up the business card-sized fortunes, and Candace arrives with the beautiful costume. She dresses Luna and places her wig, and she even gives her earrings and jewelry. We attach the plexiglass sheet in front of her, add the drapery, and plug in the crystal ball. She’s ready!
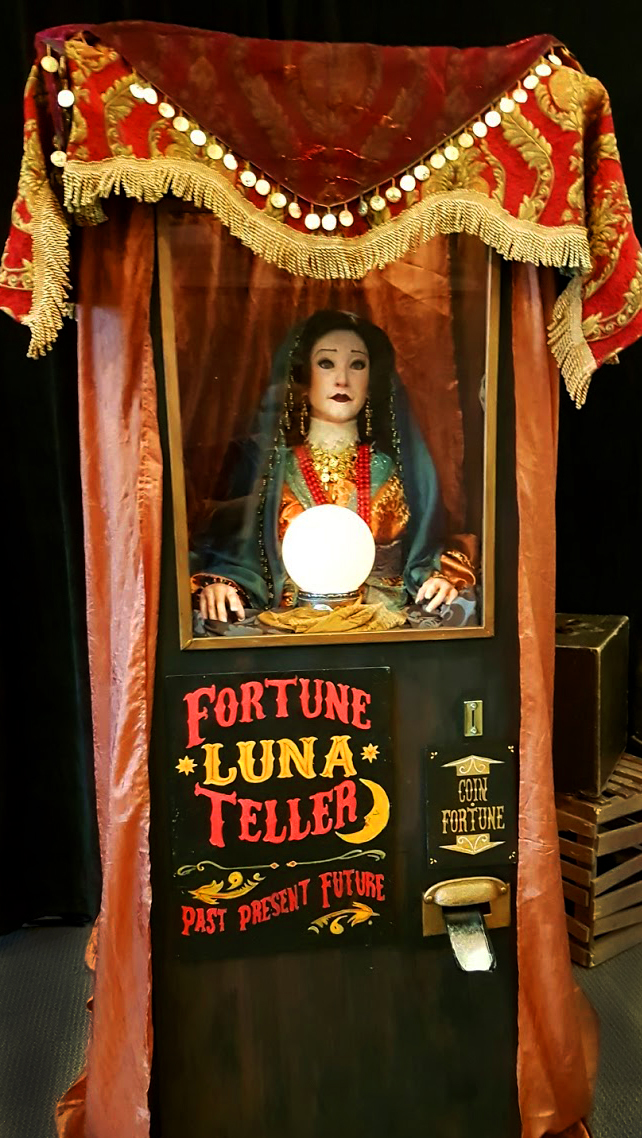
Two hours after these pictures were taken, Luna was nodding, blinking, waving her hands, and handing out Fortune after Fortune — along with her owner/operator, Giovanni Barba.
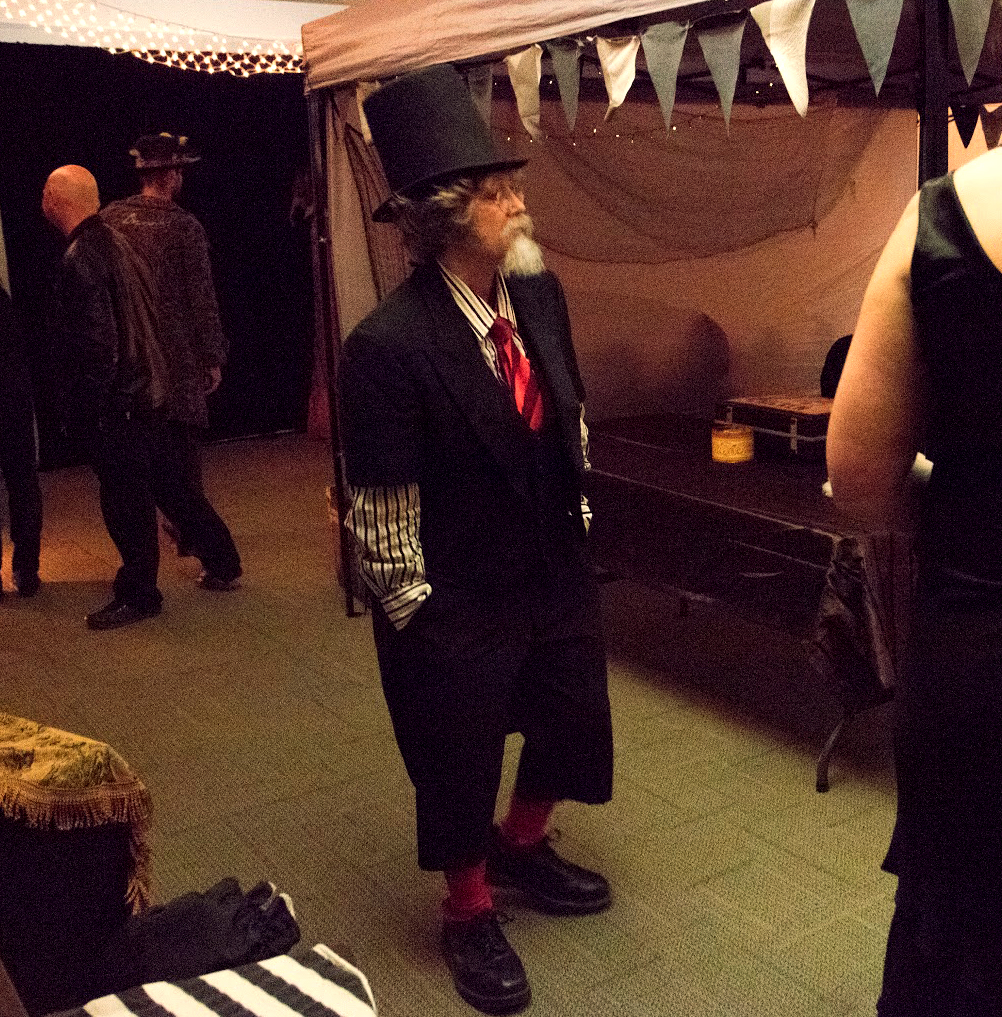
Photo by Gerald Saul
Until next time…. adventure!!
Puppetz rule
Love this. I am in awe of you dedication and achievement. She is amazing ????